Pages

Wednesday, March 25, 2020

Where Are We Today
"The Ridge"
Here we are, at The Ridge, in day five of self isolation, no better place to be as we can go outside with no fear of coming into contact with anyone.
Being able to do that is allowing us to open up all the sheds and start to get some things out for the season.
Solar light on Bunkie

We have motion sensor solar lights that are mounted on "the Bunkie", "the Restroom" and "the Hangar" that I put away for the winter and have now reinstalled.
Solar light is inside the restroom, panel on the roof

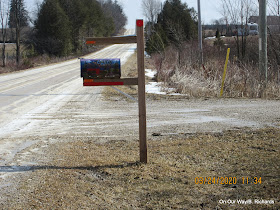
 Our Canadian Flag and our wind socks are back up, blowing in the breeze. The mailbox that we purchased and had painted in Los Algodones , Mexico, was put up at the end of the lane to receive our mail.
New Canadian Flag up

Windsock up on the shed

Our new mail box, ready for mail delivery
Last fall, Rob welded new screens into the frames of our fire pit for us, so I reinstalled them with nuts and bolts that I was fortunate to have along with a set of hinges that I had kept from an old cupboard.
Fixing the fire pit

All back together, ready for a fire

I even opened up my cargo trailer to find that my airplanes had survived their winter hibernation. When warmer weather arrives, I want to paint the inside of the trailer with paint left over from the inside colors of "the Hangar". Since re configuring the inside to accommodate the 15 foot Telemaster, I thought a change in color is due, away from the grey that it is now.
Cargo trailer opened up

When we arrived here last Saturday, we found one of our small trees had a broken branch. In an attempt  to try and save it, I have stood it back up and put tie wraps and a cargo strap to hold it in place. When we can get some fertilizer for trees, I will see if I can spray the broken area and wrap it.  We can only hope as it warms up and the sap starts to run, that it might heal its self, time will tell
Standing the broken branch back up


Cargo strap holding it place

As weather permits we will gradually get more seasonal items out and set up, along with other projects to accomplish. Hope you stay tune to either here or Patsy's Blog to see what we are up to.
Until the next time, take care and keep up the physical distancing with hopes and prayers that this soon will pass and we can once again be together.


Wednesday, March 11, 2020

On The Lighter Side


Where Are We Today
Bullhead Az.

Silver View RV Resort
In my last couple of posts I have listed and ranted about issues we have had this winter with the "Suite", all which can and will be fixed. So on the lighter side, this post is about some fun times.
Back on Feb. 11th, 2020, Keith, Ken and I headed to San Diego to tour the USS Midway Museum, which is an aircraft carrier. We spent over 5 hours exploring the ship, from the Hangar deck down to the engine room and up to the "Bridge and Flight" decks listening to a guided audio tour and talks given by volunteers. This was one of the best military museums I have been to and well worth the $26 admission. I will not bore you with the more than 200 photos that I took , but leave you with a few. For more info check out the link USS Midway.
Looking up to the Flight Deck from shore

The Brig

Corsair on the flight deck

Hangar Deck
Besides flying my R/C airplane in the desert, I have also visited/joined a couple of the clubs where we have been staying. The first one is the" Yuma Aeromodelers" who fly at their field on the north side of Yuma, Arizona. I didn't take any pics here, but you can check out their website Yuma Aeromodelers.

Address and entrance to the field


Field Sign
The second club is the "Quartzsite Desert Flyers" located in Quartzsite Arizona. The City of Quartzsite supplies the land and put in a paved runway for them. The club put up the fencing, pilot tables and covered area. The field is named after one of their members, Jim Colwell, who resides in Quartzsite for the winter months.

Looking East


Looking West

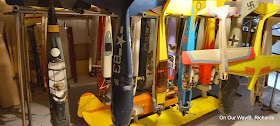
 At his property, Jim has a large building where the club holds their meetings, has a repair shop with all the tools and supplies for members to use, asking that you leave a donation to help keep it going and Jim has hundreds of planes housed there. Jim buys planes from estates and modellers getting out of the hobby and then resells them. This club has a very friendly bunch of flyers, not only from the U.S. but also Canada. For more info on this club, you can check out their web site Quartzsite Desert Flyers.
Inside Club House

Fuselages

Rows of Wings

More Fuselages


Currently we are here in Bullhead City until this Saturday, Mar. 14th, when we start our trek home. Looking back over the last 4 1/2 months, despite our issues with the trailer, this has been a great winter with the best weather of our 4 years  down here, seeing new things, places and meeting old and new friends. We have our health, and touching my wooden noggin', we have not been sick, had a cold or broken any bones.

Knowing that we have started that slow north eastward trek, we are saddened to leave the southwest that we love, but looking forward and somewhat anxious, to getting home to family and friends.
So here is to the snow being gone by the time we get there and we are able to get up to " The Ridge" in early April. Thanks for following along, comment if you like and until the next time, take care and be safe.


Tuesday, March 3, 2020

WHAT, Two In One Day!!!

Where Are We Today
As promised I have returned, sooner then you thought I might. Mentioned in my last post, we have had a series of issues with "The Suite" this winter. Although most of them we can get taken care of when we get home and covered under our extended warranty, they can still be worrisome and will still need to be kept an eye on.
The first one, which really started before we left, was a leak on the bedroom/hall closet slide. I thought I had found where it was leaking, but after hitting rain on our way down, we once again found water on the floor of the hall closet. While in Yuma, I found some 6 inch wide roof tape that I have installed on the roof of the slide. So far no more water, but we have not had any heavy or significant rain to know for sure that the issue is solved.
This is the roller that came right out of its bracket
Second, is one of the kitchen slide rollers has popped out of its bracket, fortunately the rubber weather stripping underneath the slide  kept it from falling out and losing it forever. When I discovered it, I also found a second roller for that slide, has popped out of one side of its bracket. This will be fixed when we get back home by our dealer, CanAm RV in London, an appointment has already been made.
Here is the bracket right on the end of the slide. The bracket sits on the main floor of the trailer, right at the end of the slide and just below the frig, so it supports a lot of weight.
Third, is the opposite slide, that being the table and recliner chairs/ living room slide. On one end, where the slide end wall meets the slide floor, there is a strip of metal with screws that go through it, the wall and into the floor. Some screws have come out completely, some have broken off heads and there is one that is tight and holding everything together. This is a common problem and usually fixed by inserting new screws, re tightening or drilling new holes and putting in new screws. The new screws would not tighten and upon investigating more, it seems that on the inside edge of the slide where the wall rest on top of the floor, the wall sticks out about a 1/4 of an inch past the edge of the floor. On the outside edge of slide, the wall and floor are even, as they should be. I have a thought on repairing this, but would like the techs opinion, so it will dealt with along with the other issues.  

This is the outside of the dining/living room slide, the back end. Can you see how uneven the end panel is to the bottom. The metal strip is removed at this time, you just see the screw holes.

Looking up from the bottom at the inside edge of the slide, you can see the gap created by the bottom of the wall sticking out past the edge of the floor.

This is the outside edge, see how there is no gap.

This is the opposite end of the slide, nice abd even with metal strip attached. 
Fourth is tires, which if you remember, on the fifth day out on our second winter, we had to replace all four tires. We are now having the same problem with these, sections of individual tread wearing off and one side  wall coming apart. Through many discussions with fellow RVers, I am convinced that I will run these tires at their max cold air psi., which is 125 psi, not what the garage that installed them, said to. I have taken the tire with the bad side wall off and put the original spare tire on to get home with. Yes I will be keeping a close eye on them and checking air pressure more frequently, but it does mean, new tires before we leave next fall.
Tire specs on the side of the tire. From now on my tires will be inflated to the max psi.

Side wall starting to separate, not shown is a patch of rubber about 3 inches in diameter that has come off about half way down the side wall on the inside of the tire.

Hard to tell in the pic, but that darker spot on the middle tread is lower than the other treads.

The fifth issue is twofold and deals with the "BLACK TANK". No one wants to deal with an issue  concerning one of these. The first issue is the dump valve for the tank, it is located inside near the tank and is difficult to get at. It has become very hard to open and close but fortunately, I had a second dump valve installed at the termination point, in case there was a problem with the original, which is easy to open and close. For those that know how anal I can be, I would like this fixed or replaced. The reason for wanting it fixed is simple, when at home, we dump the "grey tank" more often than the "black". If I continue to use the termination valve, I would be dumping the black and the treatment in it far sooner necessary.  I have taken it apart once before, so know I can take care of it, but not until we are home.


This is where the dump valve is located inside the trailer, not an easy spot to get at.

Here is the dump valve I had added at the termination point or where the hose attaches.

Original handle in the open position and the grey tank valve in the closed position. You can also see where the back flush connection is. The leak occurs somewhere near the top and other end of the tank, on the other side of trailer.
Part two of this issue is, I discovered that during back flushing, there is a water leak, which runs along the frame and drips down inside the basement storage area. There are those that will say that these back flushing systems do not do a great job if used the way instructed, I would agree. But I like to close the dump valve and let the tank fill up about 1/4 to 1/2 way, then open the valve and let that flush away what didn't go with the initial dumping.
Again my anality, says if something is there in the first place and working, then I want it to work, not some band aid fix or not fix it all.
Just when you think there can't be anymore, there are a couple of ongoing issues that were there before we left home. One being a piece of duct pipe, that will have to be replaced and the ongoing replacement of door catches.
Before I close this post, let me say, besides all these issues that could have sent me to drink, smoke some pot (I didn't)    or go stark raving mad, we have had a good winter, enjoying the sun, travels and many great friends along the way. We have our health and are safe. This has got to be a chapter in a very long book, so thanks for hanging in and reading to the end. Until the next time, take care, be safe and stay healthy. Thanks for your comments.


"Holy Shit" Had to Change the Crapper

Where Are We Today
Lake Havasu RV Resort
Lake Havasu City, Az.

Yes, I'm still around, not hiding in the basement or buried in the desert. I am sure that by reading Pat's blog, you all know what we have been up to.
As the title says, we had to replace the toilet in "the Suite". Now the actual replacement, taking the old one out and putting in the new one, is quite easy to do and takes about 15 to 20 minutes.
My rant with this is why we had to replace it, the foot pedal, which is how you flush it, broke. No problem you would think, just get a new foot pedal, after all, it is held on with one screw.
Broken foot pedal
After going to two RV parts stores and final checking with Dometic web site, I got the same answer at all three, no replacement parts, buy a new toilet. Oh, ours is a Dometic Model 320.
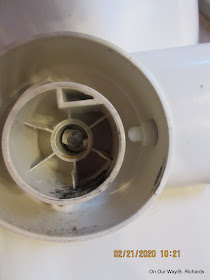
This is where the foot pedal goes in at the base of the toilet. Notice the screw that holds it to the ball flap. 

Checking prices at the parts store and online, the cost was just over $300.00. Fortunately, I found one at Camping World, and with our Good Sam Membership, we were able to purchase one for $188.00, taxes and shipping included. Placing the order on Feb 17th, it was shipped out of Bakersfield California, and we received it on Feb. 21st.
Here is the ball flap with the screw still in it.

This what it should look like when not broken

 Within an hour of its arrival , I had it installed which made two happy campers, after almost a week of having to use it with the broke pedal, I won't go in to details on how we had to flush, use your imagination.
The old toilet out, clean up the flange and install new one. The new toilet comes with new floor seal, bolts, washers and nuts.

The new one installed. One difference between the old and new, is the hand sprayer. The old one had a hand sprayer, the new one doesn't, I could have got it, but they don't work that great so opted to not have it.
This was the last of many upsets this winter and hopefully the last. There are always issues with RV's, especially when you live in them full time and travel great distances with them, you just don't want to see them all at once.
I will have more on our issues coming soon, so stay tuned , I promise not  be away for as long. Thanks for stopping in, comments are welcome and read, until the next time, take care.